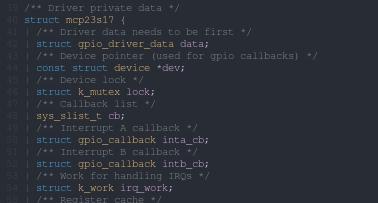
Debugging Memory Corruption in SPI GPIO driver using GDB and Renode
In this article we will look at a workflow using Renode simulator that is useful when debugging memory corruption problems on an embedded system.
Imagine you are writing a device driver for a peripheral and everything is going smoothly until your program starts crashing in a very strange way.
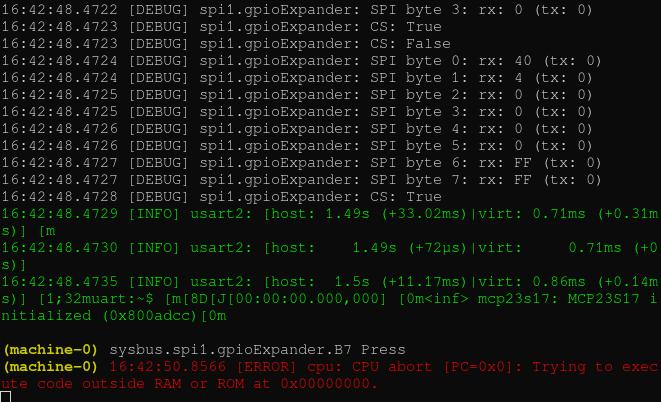
The CPU has crashed.
You dig deeper and find that memory in your device data structure has been corrupted.
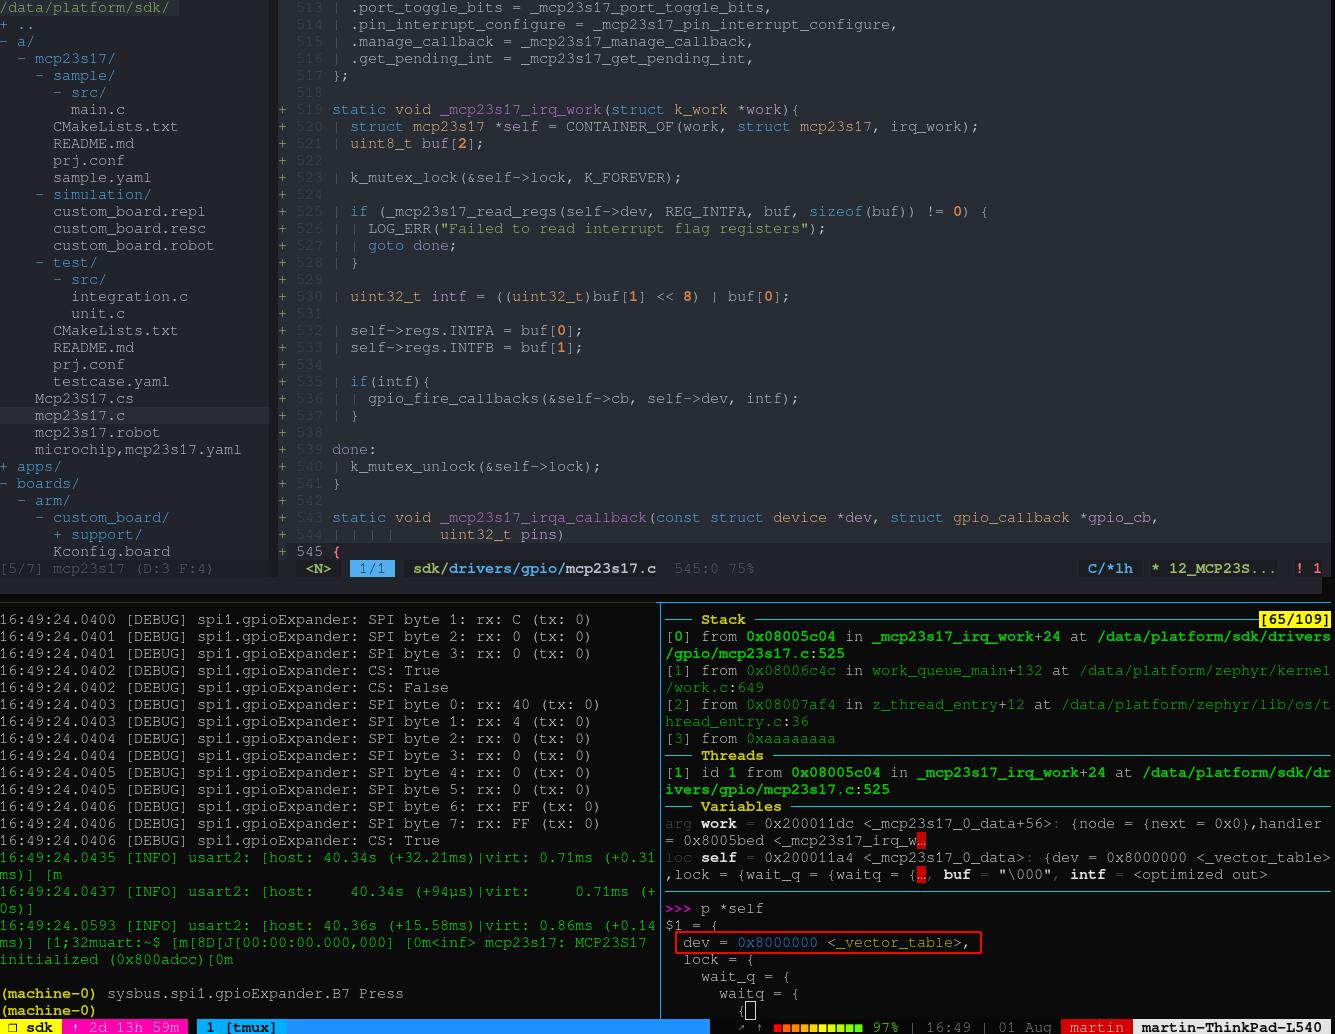
But when exactly did this happen and how can we debug an SPI driver without actually running on the real hardware at all?
In this post I’m going to show you how I did it and I’ll also explain what caused this corruption.
Some important topics we will cover in this insight are:
-
Debugging with GDB and Renode: and why it can be tricky sometimes.
-
Hardware breakpoints: can we really use them? Or maybe sometimes we can’t?
-
Zephyr GPIO driver model quirks: and how a small error can lead to hard to find bugs like this.
Debugging with GDB and Renode
Renode is a very powerful tool integrated into the Swedish Embedded Platform SDK which makes simulation of complex embedded systems rather straightforward.
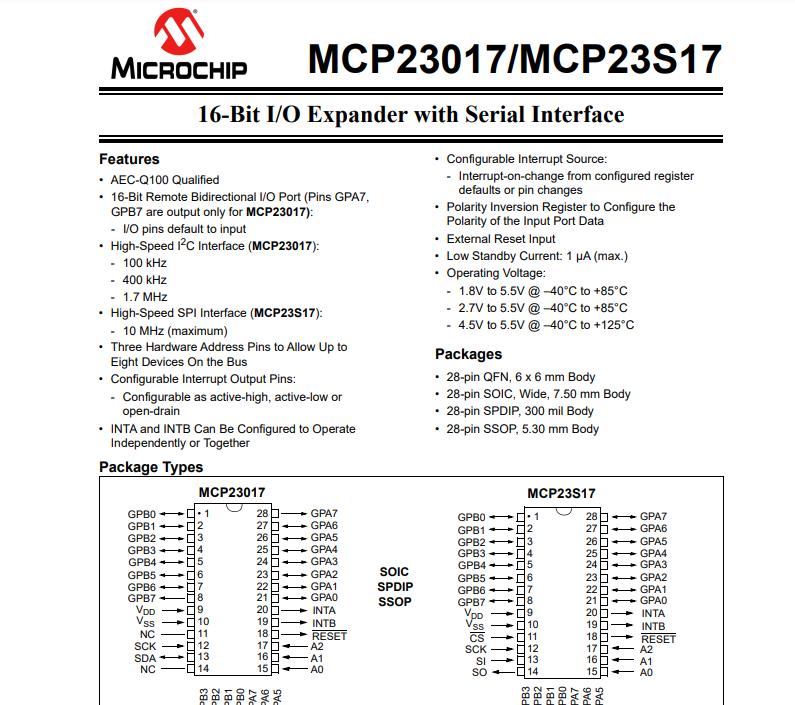
Since I’m integrating this tool with the platform SDK, one of the things I wanted to do was to create a detailed case study for writing a driver, fully testing it and simulating it in Renode. I’ve chosen the MCP23S17 because it is a fairly simple SPI device, but not too simple. It is a GPIO expander which also provides interrupt functionality and so it is perfect for a medium complexity case study where we implement GPIO driver for it and also implement the external interrupt functionality both in C and in renode simulation.
GDB Server
Luckily renode provides GDB server support and so it is very easy to connect to the simulated program and debug it. I did run into peculiar problems and managed to crash the simulator however, and I’ll explain this below.
We can boot a firmware in Renode by running a custom resc (renode resource) file:
renode --console --disable-xwt renode/samples/drivers/gpio/mcp23s17/custom_board.rescI like using the --console option to get everything printed to the same
terminal and --disable-xwt to avoid having an extra renode window pop up.
Unless you call start in the renode resc file, by default your application is
loaded but not actually running.
Once in Renode monitor console we can now start GDB server so that we can connect the program using GDB and debug it:
(machine-0) machine StartGdbServer 3333In a different terminal we can now connect to this server using gdb. To do this we call GDB with the executable elf file we would like to debug and then connect to the remote target:
pygdb build-apps/custom_board/drivers/gpio/mcp23s17/samples.drivers.gpio.mcp23s17.release/zephyr/zephyr.elfI’m using gdb dashboard and pygdb is actually an alias that I have setup which
translates to gdb-multiarch -x ~/.pygdbinit where the init script is from gdb
dashboard. I use a separate command because if GDB is to be started by some tool
it is better to have default gdb prompt and not the python UI. This alias starts
gdb in gdb-dashboard mode.
Since our application is not running, we don’t yet see any information:
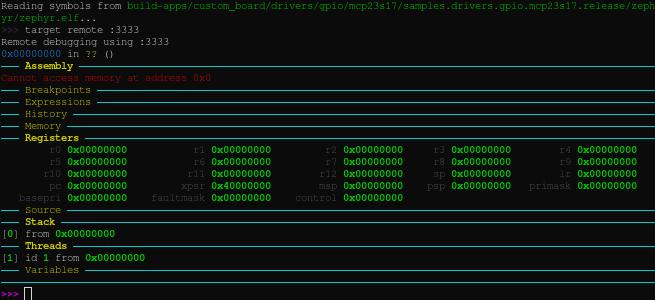
At this point we can communicate with renode using the GDB monitor command.
Monitor command is used to talk to run GDB server specific commands. For example,
if you are debugging with OpenOCD server which is connected to the real target
over JLINK or STLINK then monitor commands will be specific to OpenOCD. In our
case here, we can simply use monitor to pass commands to renode.
For example we can start our program by calling “mon start”:
    (gdb) mon start
    Starting emulation...
The emulation is now started, but we are still paused because we have GDB running. So we can simply type “c” in gdb prompt to “continue” execution.
The Obvious Approach
Let’s go back to debugging our memory corruption. The most obvious approach here would be to place a watch point on the memory location that is being corrupted and then see where that memory is being accessed.
We know that our problem occurs when we generate an interrupt on one of the pins
of MCP23S17. The interrupt is handled by the driver but in the handling function
we run into the problem of “dev” pointing to completely wrong address. It should
point to a dts structure, but it is pointing to 0x80000000.
    (gdb) b _mcp23s17_irq_work
    (gdb) c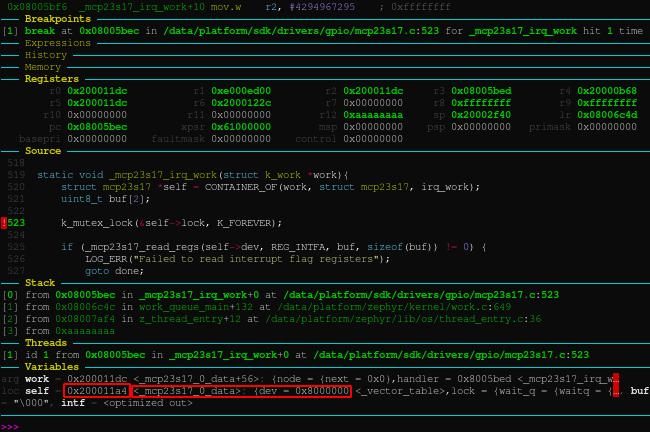
We can now reset our application by calling renode “machine Reset” and since this is static data, we can set a watch point on this address:
    (gdb) mon machine Reset
    (gdb) watch *0x200011a4
    Hardware watch point 2: *0x200011a4
    (gdb) c
There is however one caveat. Watch point on an address means that the simulation needs to compare every memory access with that address. This is particularly slow during init when memory is initialized. Thus it is better to set the watch point after the system is running.
However, we don’t know where the address is being corrupted. It is certainly somewhere between start and when the interrupt occurs. We know that when the interrupt occurs, the memory is already corrupted. We also know that the first time the address is accessed is during driver init.
What we can do then is place a breakpoint at _mcp23s17_init and once we stop
there, then we create the watch point:
    (gdb) mon machine Reset
    (gdb) mon start
    (gdb) b _mcp23s17_init
    (gdb) c
After we hit c (continue), we are going to stop in the init function. At
this time we can set the memory watch point and continue:
    (gdb) watch *0x200011a4
    (gdb) c
After this we are going to start stopping each time this memory is accessed (also keep in mind that because the first bytes of the structure are corrupted and the rest seem ok, we set the address to address of the structure. If the corruption was elsewhere then we would set the watch point on the address of the corrupted member variable).
After a few continue commands we can still see that the memory looks fine:
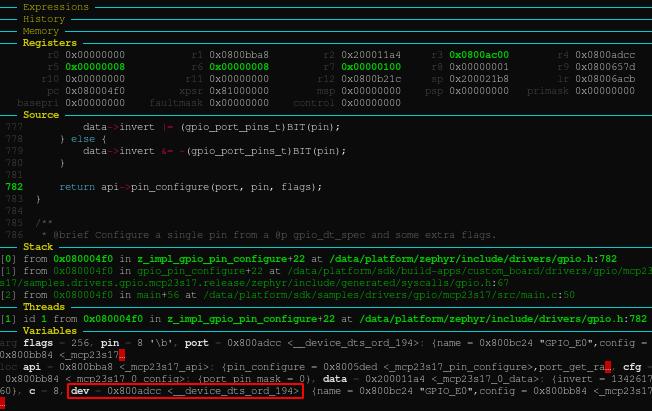
And then this happens:
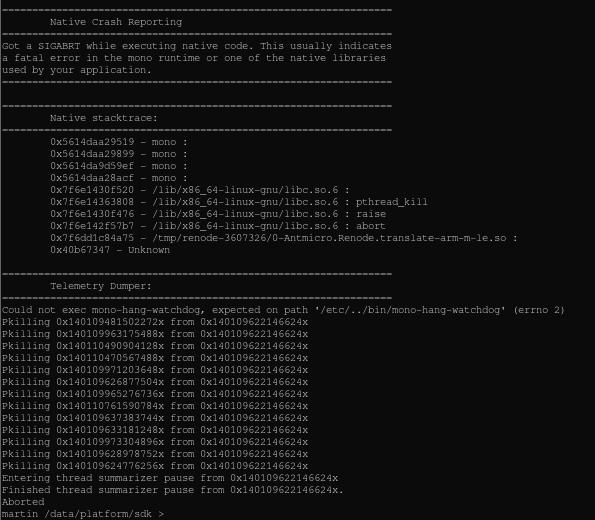
Renode crashed. It crashes deep in the emulator core so figuring out what went wrong is rather futile.
Ok so this didn’t work. What other options do we have?
Debugging it another way
Since the corruption is rather localized we can deduce a few possible scenarios about how this happens:
-
Access directly to ‘self’: maybe somewhere in our code we are accessing
selfpointer and writing something to it? -
Some code assumes that ‘self’ points to something else: this is a more likely scenario because we know that sometimes in C code people use a pattern where they place “inherited” structure first in the “extended” structure. Maybe something like this is going on here as well?
The only problem is that it’s not entirely clear where to look.
We can tell by stepping through driver init function that the structure is still fine after driver has been initialized.
So let’s try to assess the code that runs in our application.
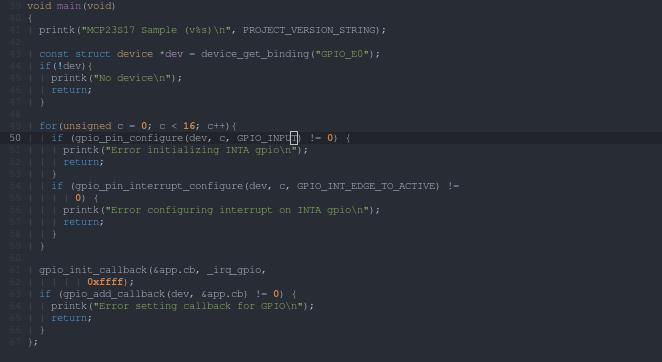
Since this is basically a sample where we create 16 virtual buttons and then press them through renode and catch the interrupts, we have the above code in the “main” of the sample. Basically it configures a callback to be received on any one of the 16 GPIO pins of the SPI adapter.
The problem is probably here somewhere.
We can place a breakpoint at main and then step through this code while checking the data to see where it gets corrupted:
    (gdb) mon machine Reset
    (gdb) mon start
    (gdb) b main
    (gdb) c
    ...
    (gdb) n
    (gdb) n
    ...
The variable we are looking for is “self→dev” which we know gets corrupted. So as we are iterating through the loop, we can print the value of this member variable using:
(gdb) p *((struct mcp23s17*)dev->data)->devIt turns out that for a few iterations of the pin initialization loop, the data looks fine:
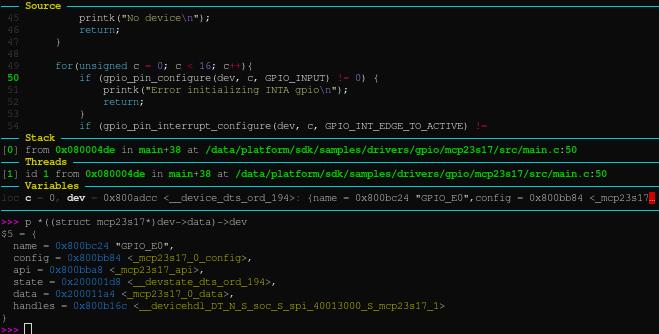
But then all of a sudden the data is corrupted:
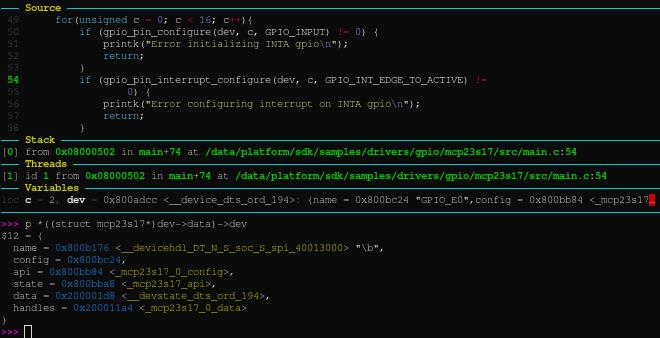
Why is that?
If we look at the code, we see that we are calling Zephyr internal GPIO configuration functions and pass it a “dev” parameter pointing to our device. If we look at the implementation of gpio_pin_configure, we see this code:
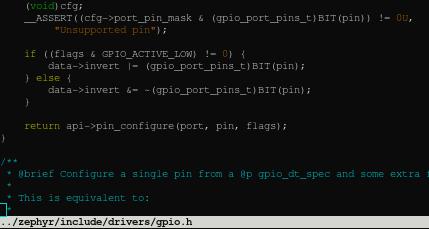
OK! So the generic gpio code assumes that our data is of type struct gpio_driver_data and then writes to our memory. Which of course corrupts
our data!
Aha! It seems the issue is that we simply forgotten to place a variable in our
structure called struct gpio_driver_data as the first struct member!
The fix then is simply this:
